
|
||
|


ASM - Theory Test Explained
The theory test is made up of a multiple-choice part and a hazard perception part. You need to pass both parts to pass the theory test.
If you pass one part and fail the other you'll fail the whole test, and you'll need to take both parts again.
The multiple-choice part
Before the test starts you'll be given instructions on how it works.
You can choose to do a practice session of multiple-choice questions to get used to the layout of the test. At the end of the practice session the real test will begin.
How the multiple-choice part works
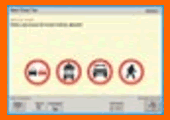
A question and several possible answers will appear on a computer screen - you have to select the correct answer. Some questions may need more than one answer.
You can move between questions and 'flag' questions that you want to come back to later in the test.
Some car questions will be given as a case study. The case study will:
- show a short story that five questions will be based on
- focus on real life examples and experiences that you could come across when driving
The test last 57 minutes and the pass rate is 43 out of 50.
 |
 |
After the multiple-choice part you can choose to have a break of up to three minutes before the hazard perception part starts.
The hazard perception part
Before you start the hazard perception part, you'll be shown a short video clip about how it works.
You'll then be shown a series of video clips on a computer screen. The clips:
feature everyday road scenes contain at least one developing hazard - but one of the clips will feature two developing hazards
A developing hazard is something that may result in you having to take some action, such as changing speed or direction.
How the hazard perception scoring works
The earlier you notice a developing hazard and make a response, the higher you will score. The most you can score for each developing hazard is five points.
To get a high score you need to:
- respond to the developing hazard during the early part of its development
- press the mouse button as soon as you see a hazard developing
- You won't be able to review your answers to the hazard perception test.
- If you click continuously or in a pattern during a clip a message will appear at the end.
- It will tell you that you have scored zero for that particular clip.
An example of when to respond to a hazard
Think of a parked car on the side of the road. When you first see it, it isn't doing anything - it's just a parked car. If you respond at this point, you wouldn't score any marks, but you wouldn't lose any marks.
The difference between a potential and developing hazard
When you get closer to the car, you notice that its right-hand indicator starts to flash. This would make you think that the driver of the car is going to move away. The hazard is now developing and a response at this point would score marks.
The indicator coming on is a sign that the car has changed from a potential hazard into a developing hazard. When you get closer to the car, you'll probably see it start to move away from the side of the road. You should make another response at this point. |
 |
At the end of your theory test
At the end of the test you can answer some customer survey questions. You don't have to answer them if you don't want to, and they won't affect the result of the test.
When you have finished the test you can leave the test room - but you won't be able to go back in. You'll then be given your result by the test centre staff.
Your theory test pass certificate
If you pass your theory test, you'll get a pass certificate. You'll need this when you book and take your practical test, so it's important that you keep it safe.
Your theory test pass certificate runs out after two years of passing your test. If you have not passed your practical test by then, you'll need to take and pass the theory test again.